Showing posts with label beauty/personal care. Show all posts

Saturday, January 9, 2010

Playing with the label maker again.

I wanted to make a few tubes of my favorite lip balm to tuck into the swap package along with the Fear of Commitment cowl (it's finished by the way and in the background blocking).

Photobucket


I ordered these cute little transparent lip balm tubes from etsy and in typical Marielle fashion had to gussy them up a bit - the easy way. So after mixing and pouring, instead of whipping out the sharpie and masking tape (my tools of choice), I dusted off the label maker.

Photobucket


Clear plastic label cartridge + my blog's name and I have to say they look very modern, very clean.

Photobucket


This time I cranked out a larger batch. I'm not planning on going into business but these are handy to have to share with friends and tuck into packages I mail out. Also, being my favorite lip balm I usually have one in the living room, each jacket pocket, my purse and even each bathroom. Why, yes, yes I am addicted to lipbalm.

Photobucket

Thursday, September 10, 2009


Photobucket

I've been so productive this week of Mr. Maricucu's vacation that I'm posting about my deodorant. No, actually I'm posting a slight caveat to my original homemade deodorant post and what I'm using now.

See, while I loved, loved, loved the homemade deodorant - it didn't love me. It worked, I didn't stink but after several weeks I experienced a rash and itchiness. I even took a break from the deodorant then restarted to see if that was the culprit and it was. After a little sleuthing on the 'net (which can easily turn you into the biggest hypochondriac, ask me how I know), I realized the baking soda was too basic and the culprit for my rash. I then began washing my 'pits at night and splashing a little apple cider vinegar on them. Poof! Problem solved. The apple cider vinegar was bringing back my skin into a proper PH. So why didn't I keep on using it? I'm lazy. Seriously, google my blog for the word lazy and you'll realize it's a pervasive theme.

Photobucket


So what's a person to do? I went back to my mami's wisdom. See, my mom tried the deodorant too, as did a close friend. They also had the reaction but mom had previously used this salt crystal deodorant. I've got nothing but love for people who are willing to be guinea pigs for my crazy concoctions. I know, you're thinking you've heard of a bunch of people who have used the salt crystal and no results. Well, seems my mom got some kind of secret memo to slather this stuff on even though it feels like you're rubbing yourself with a slippery rock. Now, don't tell her I told you so but mami sweats like a man, as do I. Aside from the initial adjustment period where your body adjusts the sweat factor to account for your not using an antipersperant, this little rock works. Oh and did you see the price? Five dollars for a year's worth of deodorant that won't scar your pits, mess with your glands or your future senility. Can't beat that.

So I keep the crystal in my shower and while my underarms are still wet I slather it on and let them airdry. Also, I don't get irritation if I shave right before putting this one. Which is not the case with the baking soda deodorant. Try putting on that baby right after shaving and don't be surprised when your significant other wonders why you're trying to reach Mariah Carey octaves in the bathroom. Only did that once.

Disclaimer: I have no affiliation with the company that makes this deodorant. I'm just a now loyal user who loves this stuff.

Wednesday, August 26, 2009

Homemade Sunscreen

Photobucket

April 11, 2010 - I corrected the % and calculated grams amount of oil which were mistyped as 4% and are now correct at 16%.

It seems sunscreen is a hot topic these days. Which brands work, which brands are more natural, which brands don't aggravate eczema, acne, etc. Then if you're considering a more natural but effective sunscreen you could end up paying an arm and a leg for a teensy tube of sunscreen. Who's going to slather on $20 a bottle sunscreen?

Fear not! You can make dare I say even better sunscreen at home without having to change out of your PJs. Oops, I said that out loud huh? I've mentioned before that the Wabi Sabi blog has been invaluable for information on making lotion and now sunscreen. I tinkered with my lotion recipe but simplified it a bit to a jojoba/water emulsion. Then I chose to start off with the minimum recommended amount of zinc oxide - 7% to see if it would be something I could use on my face (which in case you're wondering is not white thus the perfect litmus test).

I bought micronized zinc oxide from Garden of Wisdom. I know some people are concerned about micronized particles but I've read a bit, just enough to convince me it's not a great concern. Have to pick your poison, right?

Photobucket


Marielle's Homemade Suncreen
note: Again with the scale, but I don't mix bread or beauty products without my trusty scale. Too much margin for error and I'm a very picky customer.

78.5% Water - brought to a boil

16% jojoba oil
2% e-wax
2% BTMS emulsifier

1.5% Cosmocil CQ - a preservative

that makes for a 100% lotion formulation, then I calculate 7% of that weight for the zinc oxide amount. And people said you don't use math everyday. Pshaw!


Here's my math for this 6oz batch of sunscreen (two 3oz bottles). When I calculate I do it in decimals but when I weigh out ingredients I do it in whole grams.

6oz = roughly 170 grams

143.65 grams water
27.2 grams jojoba oil

3.4 grams e-wax
3.4 grams BTMS emulsifier

2.55 grams Cosmocil CQ

Then 7% of 170 grams is 11.9 grams of zinc oxide.


First boil your water and then melt your oils and waxes together.

Photobucket


My sunscreen mise en place. My hot water, the oils/waxes, cosmocil (clear fluid in the rear custard cup) and the zinc oxide. Making lotion is a pretty fast process. Just make sure the water and oils are still hot in order to emulsify well.

Photobucket


Add the hot water to the oil/wax mix (the oil phase) and instantly the mixture will turn a milky white.

Photobucket


Photobucket


You can either mix it by hand (I'm using a butter knife) or a stick blender. I've done both. However, the stick blender tends to aerrate the mix more quickly and makes a thicker lotion right away. I wanted a thinner liquid while warm for easy pouring and the sunscreen will still thicken as it cools.

Give the mix a good stir. Then let it cool just a bit. My preservative - the cosmocil - has to be used at temps below 176 degrees fahrenheit so I let the mixture cool just slightly (still hot) then mix in the cosmocil.

Photobucket


Immediately after the preservative while the mix is still hot I stir in the zinc oxide. Surprisingly the powder mixed in very well. I let the sunscreen cool to a moderately warm tempeture then I'm ready to bottle.

Photobucket


Photobucket


I bought these bottles at Wally World for a buck each. They're called Malibu bottles and are also available online. They are very similar to commercial sunscreen packaging and great for dispensing lotions since the cap is on the bottom.

Photobucket


Pour in the sunscreen and get your super fancy label on there. I know, someone as OCD as me should have some kind of PDF printable, gussied up label for her beauty products. No thanks. Masking tape and a sharpie. Easy to get on but most importantly, easy to get off. I just write the date, the percentage of zinc oxide and the main emollient ingredient (jojoba) so I remember for next time.

Photobucket


While the sunscreen is cooling, shake the bottle every five minutes or so. This will ensure that the zinc oxide stays suspended until the lotion sets up after it cools. That's it. Homemade sunscreen.

Photobucket


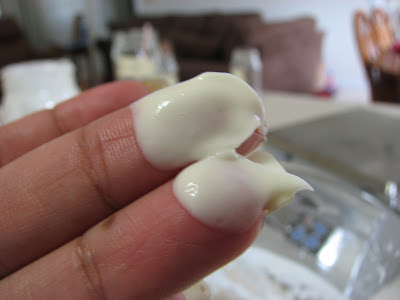
A test patch on my skin. A swipe of sunscreen above, then a swipe of blended sunscreen right below. No white cast. The true test would be on my face. That day I applied a full face of sunscreen and blended it very well. Despite my blending there was just the teensiest bit of lightening on my skin. But you should know that I'm super picky about shade fluctuations on my face. I use mineral makeup that I get custom blended by Rhonda at BareFaced Minerals. Having been a woman of color all my life it's just something I'm very aware of. If you are fair skinned, this should not be an issue. In fact, I can use this on my body and on the kids, it sinks right in without a whitish cast at all.

Photobucket


So I'll stick to my mineral makeup for sun protection on my face (zinc is also the main ingredient) and use this sunscreen on my body. It's very silky, again sinks right in and absorbs without feeling greasy. Very important if I wanted Mr. Maricucu to wear it while working on the yard and the boys to wear it while playing. A bonus, again thanks to info on wabi sabi, is that zinc oxide is a very soothing ingredient. Of course, it's a big ingredient in diaper rash cream and because of this, you can use the sunscreen as a cloth diaper-friendly rash cream. A multitasker, gotta love that.

Monday, July 27, 2009

Summer Shearing

I'm not a hairstylist by any stretch of the imagination but about three years ago I bought a Wahl clipper kit and figured I'd better learn before the boys were too particular about their hairstyles. I mean, three men going to cut their hair at a salon every two weeks adds up. Not to mention the hassle of setting aside time to go to an appointment and let's not even get into the freak out a certain young toddler had in the stylist's chair before the scissors even came out.

So I cut Mr. Maricucu's hair as well as the boys here at home. I cut my own hair too but that's a story for another day. Today I trimmed Mr. Maricucu and then realized that my oldest - blessed with an amazingly thick head of hair - needed a trim as well. We're talking out of control. My mom shudders when she hears me mention haircuts. She loves the thick, shaggy look which is kind of ironic for someone who kept my brother's hair about 1/4" long. I'm sorry mom, when even a wet combing won't bring down the crown, it's time to trim.

Photobucket


Ahhh, I feel refreshed just looking at him. He actually finds it much cooler with a closer cut.

Photobucket


Fortunately for me, my younger son has finer and lighter hair that means I can just use one comb all over. He's extremely ticklish and asks me if I'm done about two minutes into the haircut. I buzz him all over then do the sideburns and nape as quickly as I can. Forgive the scrapes on his face, he had an unfortunate encounter with the ground in the backyard. The ground won.

Photobucket


The baby and I didn't get haircuts today but she's sporting two new teeth and wanted to say hello to the family.

Photobucket

Thursday, June 11, 2009

Vitamin C serum and a thank you


My younger sister and I shared a room from the day she was born until the day I got married. To say she knows me pretty well even though we've been living in separate states for 9 years is an understatement. Yesterday I received a package from her for my birthday filled with some wonderful surprises.

First these beautiful dressed up sandals. Drool worthy, very drool worthy. I'm a Florida girl at heart and much to my poor mother's dismay spent my first two North Carolina winters in denial that I shouldn't wear flip flops in coat weather. I'm a bit more level headed now and save the flip flop wearing for February at the earliest. These little beauties are perfect. A little flair under my feet and a little bling on top to dress them up.


She knows me oh so well. But that wasn't all. Included with a heartfelt note was fabric money! Yes, I was instructed to spend it on fabric and I must obey the orders of the gift giver. So I'll dutifully find some luscious fabric to spend it on soon. Thank you very much H. for the wonderful birthday surprise.

Appropriately themed with my aging is this do it yourself vitamin C serum. A couple of months ago I found this recipe on the web. I wanted to try it because I tend to scar up pretty easily with blemishes and I tend to get dark splotches on my skin from the sun. I've always had great luck using chemical exfoliants like BHA and AHA but really don't want to deal with the parabens and other not so great ingredients.

I ordered my ascorbic acid, but didn't have glycerin around so I made it with 2 teaspoons of water. I put it on that evening and the next morning while rinsing my face I noticed a difference right away. A glow, smoother tone of the skin. Pretty much the post-facial glow without the price tag. Sold. I fell off the bandwagon for a few weeks but today decided to mix up another weekly batch and this time I tried it with glycerin to see if there was any difference. Glycerin is a humectant and I was curious. I will say the glycerin is too much in the original quantity. Next time I'll only use about 1/4 teaspoon of glycerin and 1 3/4 teaspoon of water for the 1/4 teaspoon of ascorbic acid powder.

Now, just a few tips:

* Make sure you buy ascorbic acid powder without any additives. You should be able to find it online at supplement stores like Vitacost or locally at healthfood stores.

* The serum only lasts a week or so in the fridge. Really that's not an issue because once you try it, you'll want to slather it on your arms, the top of your hands, your chest, legs, etc. The fluid should be clear but if it turns yellowish or any other color, toss it and start a new batch as the vitamin C has oxidized.

* Be sure to follow common sense hygiene and use clean fingers, etc. so as not to cross contaminate the batch. I keep mine in a dark amber dropper bottle as vitamin C is sensitive to light. Again these bottles are available online or your local healthfood store.

* Apply the serum either at night or in the morning but apply it to bare skin and wait 30 minutes before applying any other product to allow the serum time to absorb and begin working. Adding another product before the 30 minutes would affect the PH of the serum and make it less potent.


First, mix the ascorbic acid with water. I noticed that the powder didn't dissolve as well with the glycerin so mixing it with the water first is best. Then add the glycerin. (I used a 1/8 teaspoon measuring spoon but did add 1/4 teaspoon total).


Pour into your clean bottle and proceed to slather on. Remember, store in the fridge and make a new batch each week. This is super cheap. The 8oz jar of ascorbic acid powder cost me all of $8 and at 1/4 teaspoon a week will last me quite a while. However, the most important point is that you'll always have a potent batch of vitamin C serum. Every other product on the market loses potency as it sits on the shelf and oxidizes. You end up paying $40+ for a pretty glass bottle of oxidized vitamin C that at best won't do anything for your skin and at worst might actually make things worse.


My mom and I are always sharing tips we've found for the home, beauty, health, etc. Since I've been tinkering with beauty recipes I pass them on to her and she excitedly shares them with my aunts, her friends, etc. My father has teased her saying that the day I go up in a cloud of smoke with some freaky concoction there will be at least another half dozen echo smoke clouds in South Florida.

Friday, May 1, 2009

Homemade Lotion In the House!


Creamy, soothing I-know-exactly-what's-in-it, homemade lotion. I made it mostly for my eczema prone middle child but also because I'm slowly phasing out some of the major offenders in our personal care products. Since I already tackled lipbalm, then deodorant, this lotion was the next logical step.

A simple google search turns up hundreds of homemade lotion recipes. I narrowed down my inspiration to wabi sabi's tutorial as well as the formulary section of Lotion Crafter and Mystic Mountain Sage.

Lotion is very easy to make once you realize it's a three part emulsion. Basically oil+water+emulsifier. A typical lotion is 75-80% water and 20-25% water. If you plan on keeping your lotion out of the fridge (read wabi sabi's explanation on shelf life) then you'll also need a preservative. I chose Cosmocil CQ after spending way too much time on the Skin Deep database looking for a less harmful alternative. Finally the first version of the recipe!


Maricucu's Soothing Lotion

78.5% water

4% cocoa butter
4% rosehip seed oil
4% unrefined organic coconut oil
4% jojoba oil
2% e-wax
2% BTMS emulsifier

1.5% Cosmocil CQ
2-3 drops of essential oil per 1 oz. of lotion (I chose calendula extract for its soothing properties, plus lavender and tea tree oil for their healing properties).

Today I was making 24 oz. of lotion so my proportions were as follows (roughly rounded since my scale only weighs in whole grams).

680g = 24oz (3-8oz bottles)

water 534 g

cocoa butter - 28 g
jojoba oil 27 g
rosehip seed oil 28 g
coconut oil 27 g

e wax - 13 g
btms - 14 g


cosmocil 10 g
calendula extract - 48 drops
tea tree EO - 24 drops
lavender EO - 24 drops


First weigh out your water and oil/wax phases in separate heat safe containers.


Bring the water to a boil and melt the wax/oil phase. I used the microwave although next time I'll use a double boiler for the oils.


Pour the oil mixture into the water mixture. The lotion will instantly start turning milky white.


Blend well to emulsify. I used a stick blender but you can also use a standard blender or even with a whisk by hand. The emulsifying wax will do the work for you.


Then realize that your blending container is too small for this batch and pour in a larger container before blending in the cosmocil and essential oils/extracts.


Pour into bottles while still warm, otherwise it will be too thick to pour.


Clean up the lotion you poured outside the bottles and cap. Let cool and label. Despite using a preservative you'll want to use this lotion pretty quickly to benefit from the various oils and extracts. Like any other personal care item if it turns color on you or smells funky at all toss it.


Next time I will reduce the wax slightly and increase the oil phase just a tad. Aside from that, the lotion felt very nice, absorbed completely into my skin and both sons kept asking me to put more on them including the oldest who would rather dry like a leaf than have anything goopy on his skin. I'd say it was a success!

Thursday, April 23, 2009

Nope, I don't stink - Homemade Deodorant

Update on September 9, 2009. I've stopped using this deodorant for reasons posted here.


Ahh yes, another installment in the "what will Marielle try next?" series. A few months ago I decided I wanted to give homemade deodorant a try. I saw Amy's post several months before that but never really thought it would be something for me. A few months ago my mom was diagnosed with breast cancer and thankfully (blessedly) it was caught early and a lumpectomy removed it all. I figured with the risks associated with aluminum in deodorant even if minor it just hit too close to home.

On to the recipe and my tweaks. I've mentioned with nut allergies we avoid shea butter. Also you've heard me wax and wane about my wonderful unrefined coconut oil. I figured this would be the perfect application. It has slight antimicrobial properties which along with the baking soda, tea tree oil and lavender should knock out any nasties I might be able to produce. Plus with the slightly lower melting point (76 degrees) it would be perfect to scoop out with my finger. Since it does have a slightly lower melting point and to avoid melting in the summer I included 1 tablespoon of unrefined cocoa butter. I also reduced the baking soda slightly. The vitamin E works as an antioxidant and the cornstarch tempers the baking soda which can be harsh in large quantities.

I've read this warning on other pages re: shaving. Don't put this deodorant on if you shaved that morning. Instead I opt for straight coconut oil the morning of shaving or I just shave at night. Problem solved.

Homemade Deodorant
adapted from Angry Chicken

4 tablespoons coconut oil - unrefined is preferable
1 tablespoon cocoa butter - unrefined as well
2 1/2 tablespoons baking soda
2 tablespoons corn starch
2 vitamin E gelcaps
15 drops Tea Tree Oil
10 drops Lavender essential oil - you can certainly switch up the essential oils but aside from creating a lovely different scent these two have antimicrobial and soothing properties


First measure out the coconut oil, cocoa butter, baking soda and corn starch in a microwave safe bowl. If you add the essential oils in now they will evaporate and it's not good to heat the vitamin E with everything else. Microwave in 30 second intervals until the coconut oil is melted and the cocoa butter is starting to melt (the cocoa butter takes a bit of stirring and more nuking to melt). Give the mix a good stir to dissolve the baking soda and corn starch.


Now pierce the vitamin E gelcaps and squeeze the contents into the bowl. Also add the tea tree and lavender oils. Stir.


Pour into a clean 4-8oz container. I used an 8oz spice tin but any small container that allows you finger clearance will work. Put in the fridge to set it up.


I scoop out about a peasized amount for each arm and with the coconut oil my body heat pretty much melts it as I rub it on. Doesn't feel greasy thanks to the baking soda/corn starch and like Amy mentioned, doesn't leave white residue on me or my clothes as it rubs on clear. Also it is true there's a period of "detox" when you go off traditional deodorant/antipersperant combos and on this. I sweat a lot (but didn't stink) the first two weeks then I tapered off on the sweating. The best part is the homemade deodorant works and I don't get that awful chemical burn on my armpits from the traditional deodorants. I know, probably way too much information but I felt like putting it all out there.

Again, some if not most of these ingredients are found at your local healthfood store. If you prefer shopping online I've loved doing business with any one of the following:

Mountain Rose Herbs
Mystic Mountain Sage
Lotion Crafter
From Nature With Love
The Herbarie

Wednesday, April 22, 2009

Freedom from the beauty machine - Homemade Lipbalm Edition


That little box my friends is my ticket to a little more freedom from the beauty machine. Inside are the ingredients for making my own deodorant, conditioner, lip balm, face cleanser, lotion and hair gel.

Anyone who knew me before I had children knew what an absolute makeup and beauty product junkie I was. When you're on a first name basis with not one but most of the various sales associates at the department store makeup counters, it's bad. Or when you belong to discussion forums dedicated solely to talking about the latest cream, eyeshadow or other beauty product, you know it's become an addiction. I came by the addiction honestly. Having acne issues since I was 13 my parents paid for dermatologists, facialists, prescriptions, home party skincare plus everything in between. Several years ago I finally found Paula Begoun, her line of books and her skincare line. I loved her empowering approach of educating consumers on ingredients, good and bad products as well as offering an affordable yet effective alternative in her own line. I used it faithfully for years, even had my mom and grandma in on the secret.

However, within the last 3 years I've been exploring more natural and homemade alternatives for both beauty products AND medicinal items. It all started with no poo. What's that you say? No poo - as in no shampoo. That's right I haven't used shampoo on my hair in over 2 years. I wash my hair with conditioner but that will be a separate post. After no poo I found the wonder that is coconut oil for my son with eczema and then I did the unthinkable - I slathered the stuff on my face. I began to wash my face with honey, found more natural body washes. I learned to make my own deodorant which wasn't filled with aluminum. It was just a wonderful slippery slope of discovering new ways that I could take control of what went in and on my body. Plus I'm a geek who loves to tinker with recipes whether food or not.

Today I tackle lipbalm which is pretty straightforward as long as you listened to my advice about buying a kitchen scale. My all time favorite lip balm for the last 10+ years has been Neutrogena Lip Moisturizer. If you've never tried this beauty secret of makeup artists it's nothing like chapstick. This is a light, creamy but not waxy lipbalm with a tiny bit of shine from the castor oil. It has no menthol or camphor like Carmex which actually dries your lips. With the NLM your lips feel soft even when it's worn off. But alas the honeymoon is over. Even if it wasn't filled with some less than desirable ingredients I was having a hard time finding it in stock. Also, $4 a tube? I was indignant.

So I did a little googling and found this formula for exactly the type of lipgloss I needed. I don't use shea butter because my son is allergic to tree nuts and peanuts. My formula which makes a little more than 3 tubes (.15oz each) is as follows:

Maricucu's Moisturizing Lip Balm

3 g beeswax
3 g coconut oil, unrefined
2 g cocoa butter, unrefined
3 g jojoba oil
3 g castor oil
1 vit. e gelcap


Weigh everything in a glass microwave safe cup except for the vitamin E gelcap. Microwave in 30 second intervals until the beeswax and cocoa butter are melted. Don't overheat, stir often and those last bits will melt with stirring. You can also do this in a double boiler on the stovetop.


Here it is melted. Pierce a hole in the vitamin E gelcap and squeeze into the balm mixture, stirring.


Next line up your lip balm tubes and your melted balm along with a utensil to pour it in (I used a plastic pipette but that was a mistake, next time I'll just pour it in with the cup).


Fill the tubes halfway and let the balm set.


Then fill up the remaining half of the tube. The balm contracts as it cools and if you'd filled the tube all at once there would be a divot in the middle top of the tube.


You can tell I was trying to overfill that last tube and it came out a bit lumpy. Just means that's the first tube to be used. Let the tubes cool for 20 minutes then cap. This recipe was a winner on the first try. The castor oil provides that sheen without feeling like cooking oil, the rest of the oils/butters moisturize and the beeswax adds a bit of body without making the balm feel like chapstick. I will definitely keep it as is. If you'd like a soothing lipbalm you can use calendula oil as one of the liquid oils. Essential oils are great for flavoring the balm (think orange, peppermint or lime, yum!)

Where to purchase the ingredients and supplies? Here are several online stores which have great products, good information and amazing customer service:

Mountain Rose Herbs
Mystic Mountain Sage
Lotion Crafter
From Nature With Love
The Herbarie